
El Cheapo
Solar Slow Cooker

For those with fewer pesos to rub together, El Cheapo is a contender. Yes, there are other offerings (google "$5 dollar solar cooker," but cheap is only good if it works. In the tropics, or on summer afternoons in temperate regions when the sun is high, a black pot in a bag in just about any medium sized reflector panel cooker will cook. To work early in the day, late, or in temperate areas when the winter sun is not real high, reflectors will be needed.
But first, let's keep it simple, as in simple enough. Find a cardboard box. Exact size can vary, but the prototype was a 19" x 15" x 12" high box, seemingly a non-standard size as 20" x 18" x 12" is more optimal. The pot is a 3 qt. (3L) Granite Ware Covered Round Roaster. It can go in an oven bag or inside of two glass bowls that form a sort of oven. Those not having glass bowls can cover the top of the cooker with a large turkey sized oven bag, or a piece of glass. Some thrift stores will have pieces of glass real cheap, and using a glass cutter as needed is doable. Any Lexan or acrylic plastic sheet would also work. A light wooden frame could be covered with one or two layers of plastic. So if not working as a panel type cooker, add glazing and El Cheapo becomes a solar box oven made from a cardboard box.
Cardboard not durable enough? Paint the cardboard with elastomeric roof coating and coat everything that isn't reflective. If covered so it can't fill with water, the box can be made all-weather.
Details of Making the Basic Box
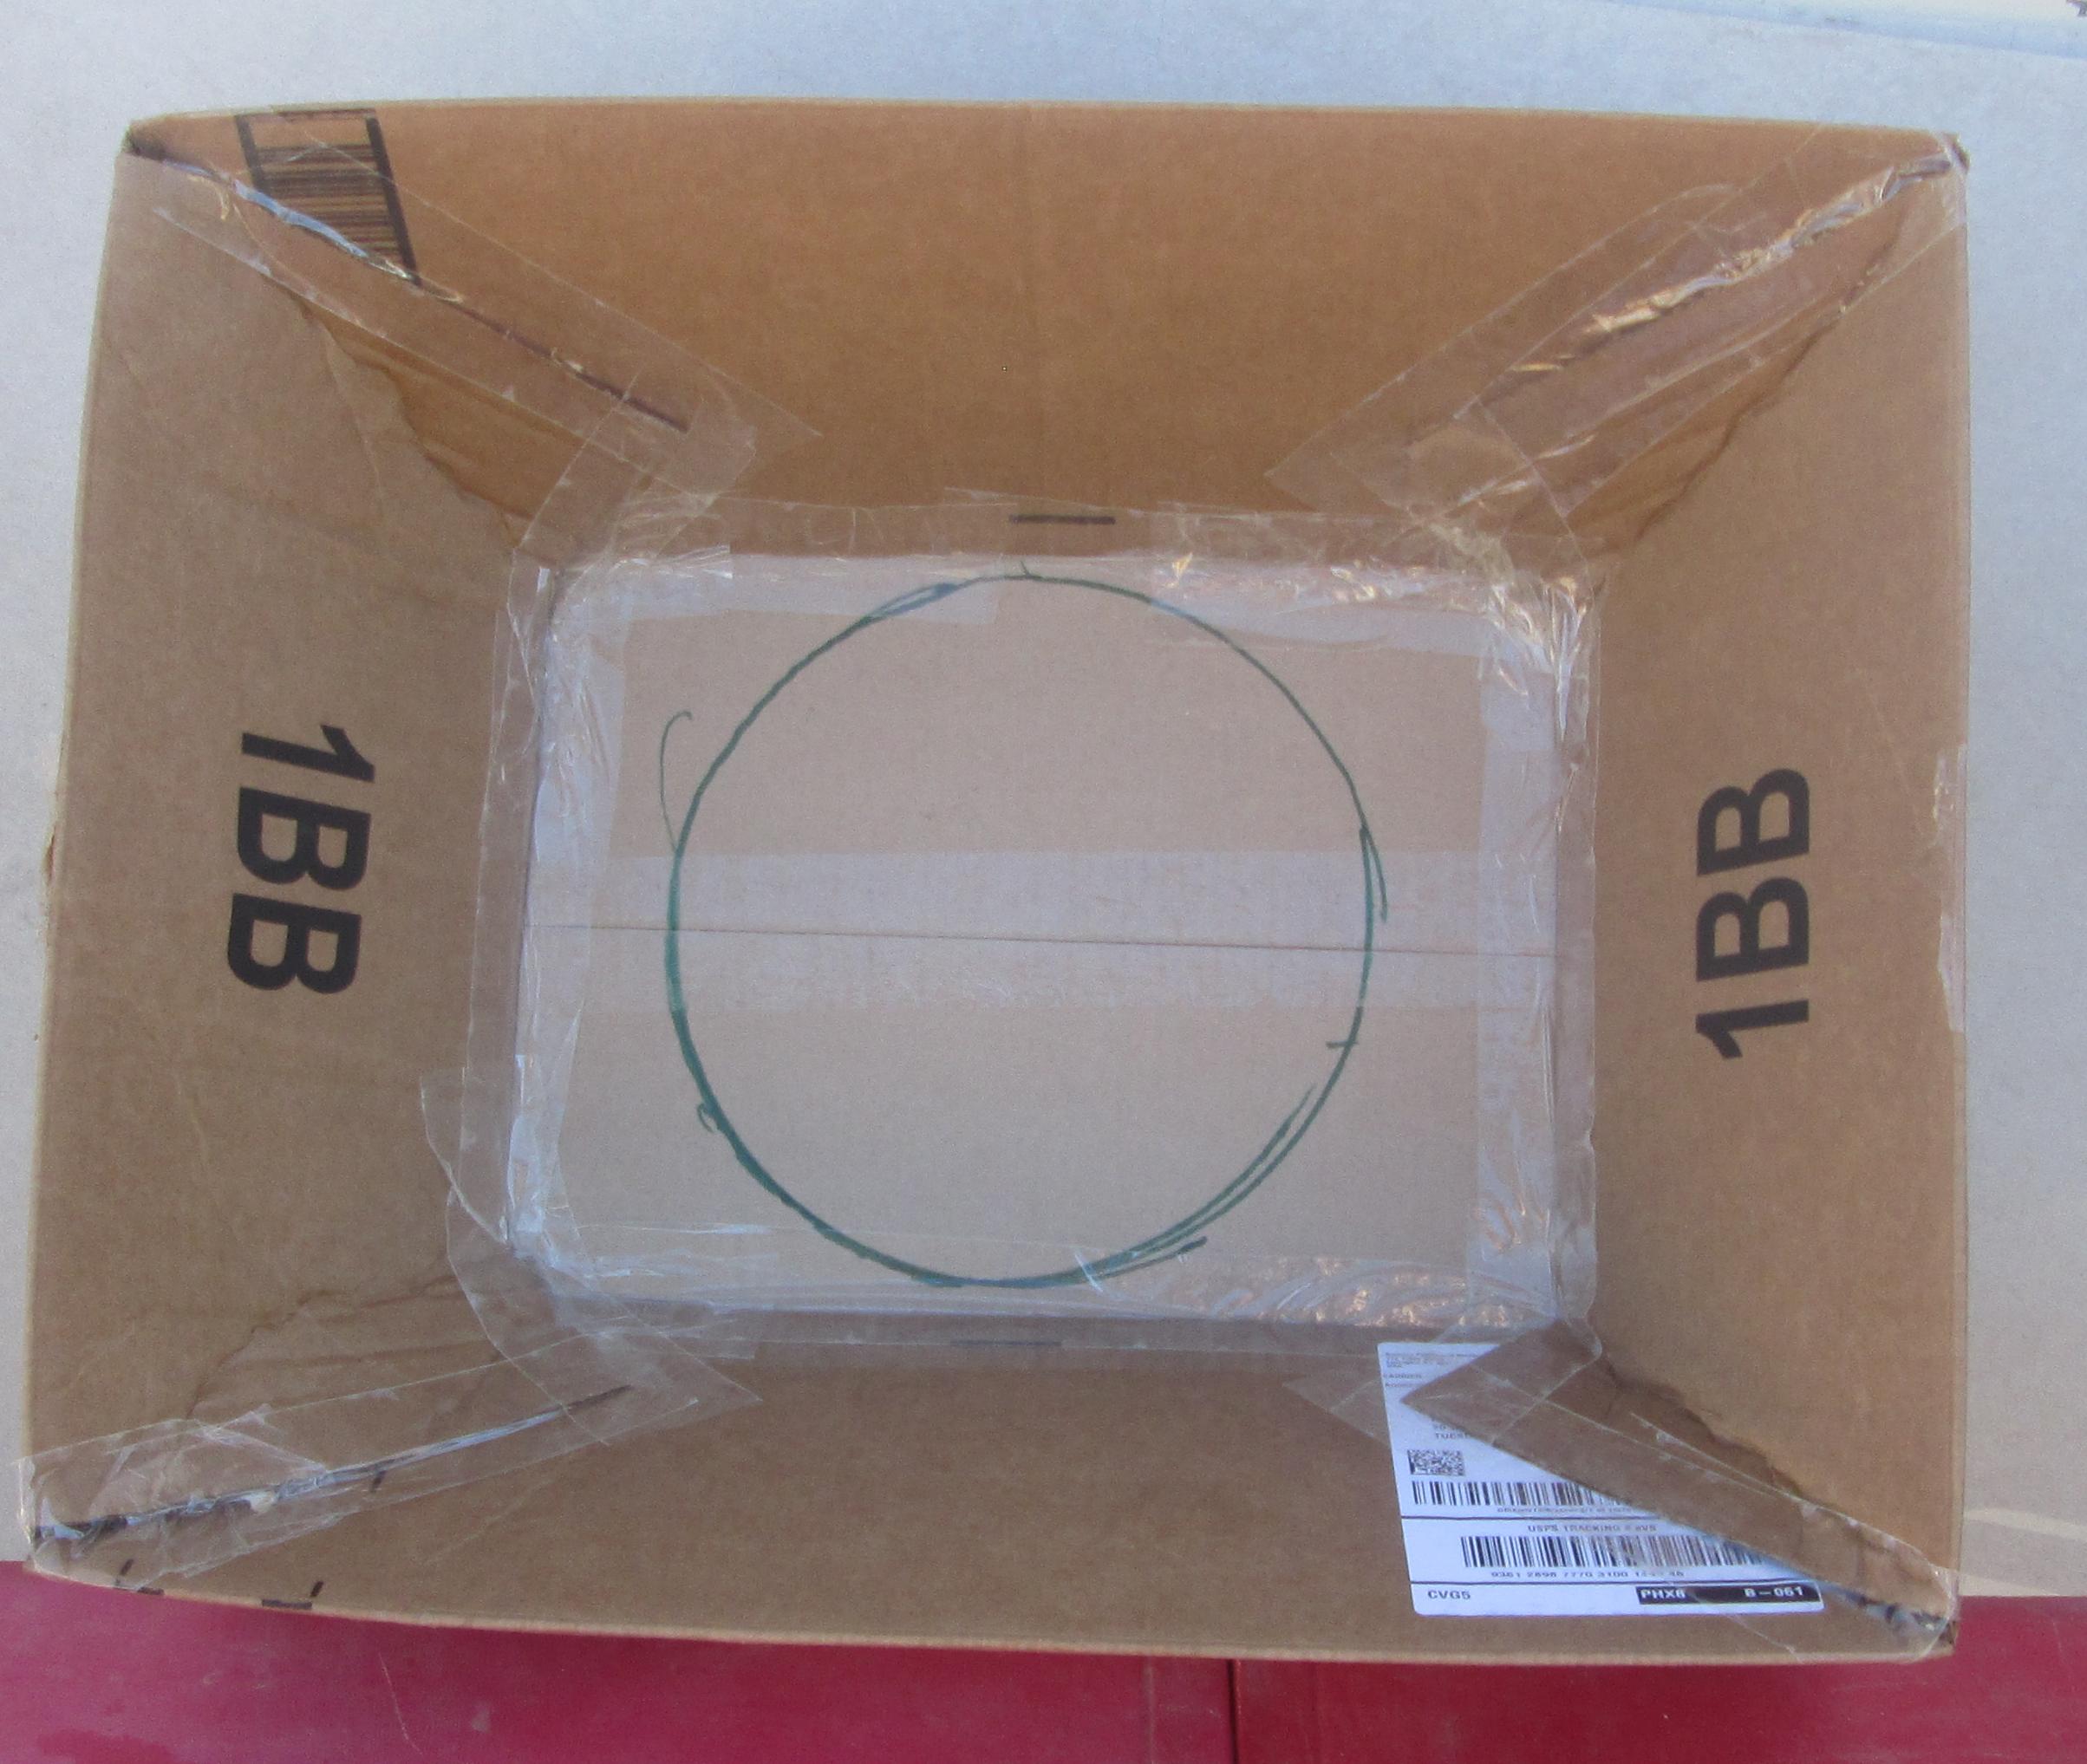
So maybe you have a 15" x 19" x 12" high cardboard box with flaps. Most of the work is already done, but a box of whatever desired size could be made from a larger box. Inside this box is another smaller box, about 12" x 9" x 4" high that serves as the bottom supporting the pot. But why not just set the pot on the bottom of the big box? The smaller box is filled with wadded up paper to make a 4 inch insulated floor. One layer of cardboard sitting on the possibly cold ground isn't enough to keep the pot you're trying to heat from not getting so hot. Insulation, in an oven cooker, can be a good thing, a very good thing. The well insulated small box was centered in the large box and more wadded up paper added to hold it in place and make for better insulation.
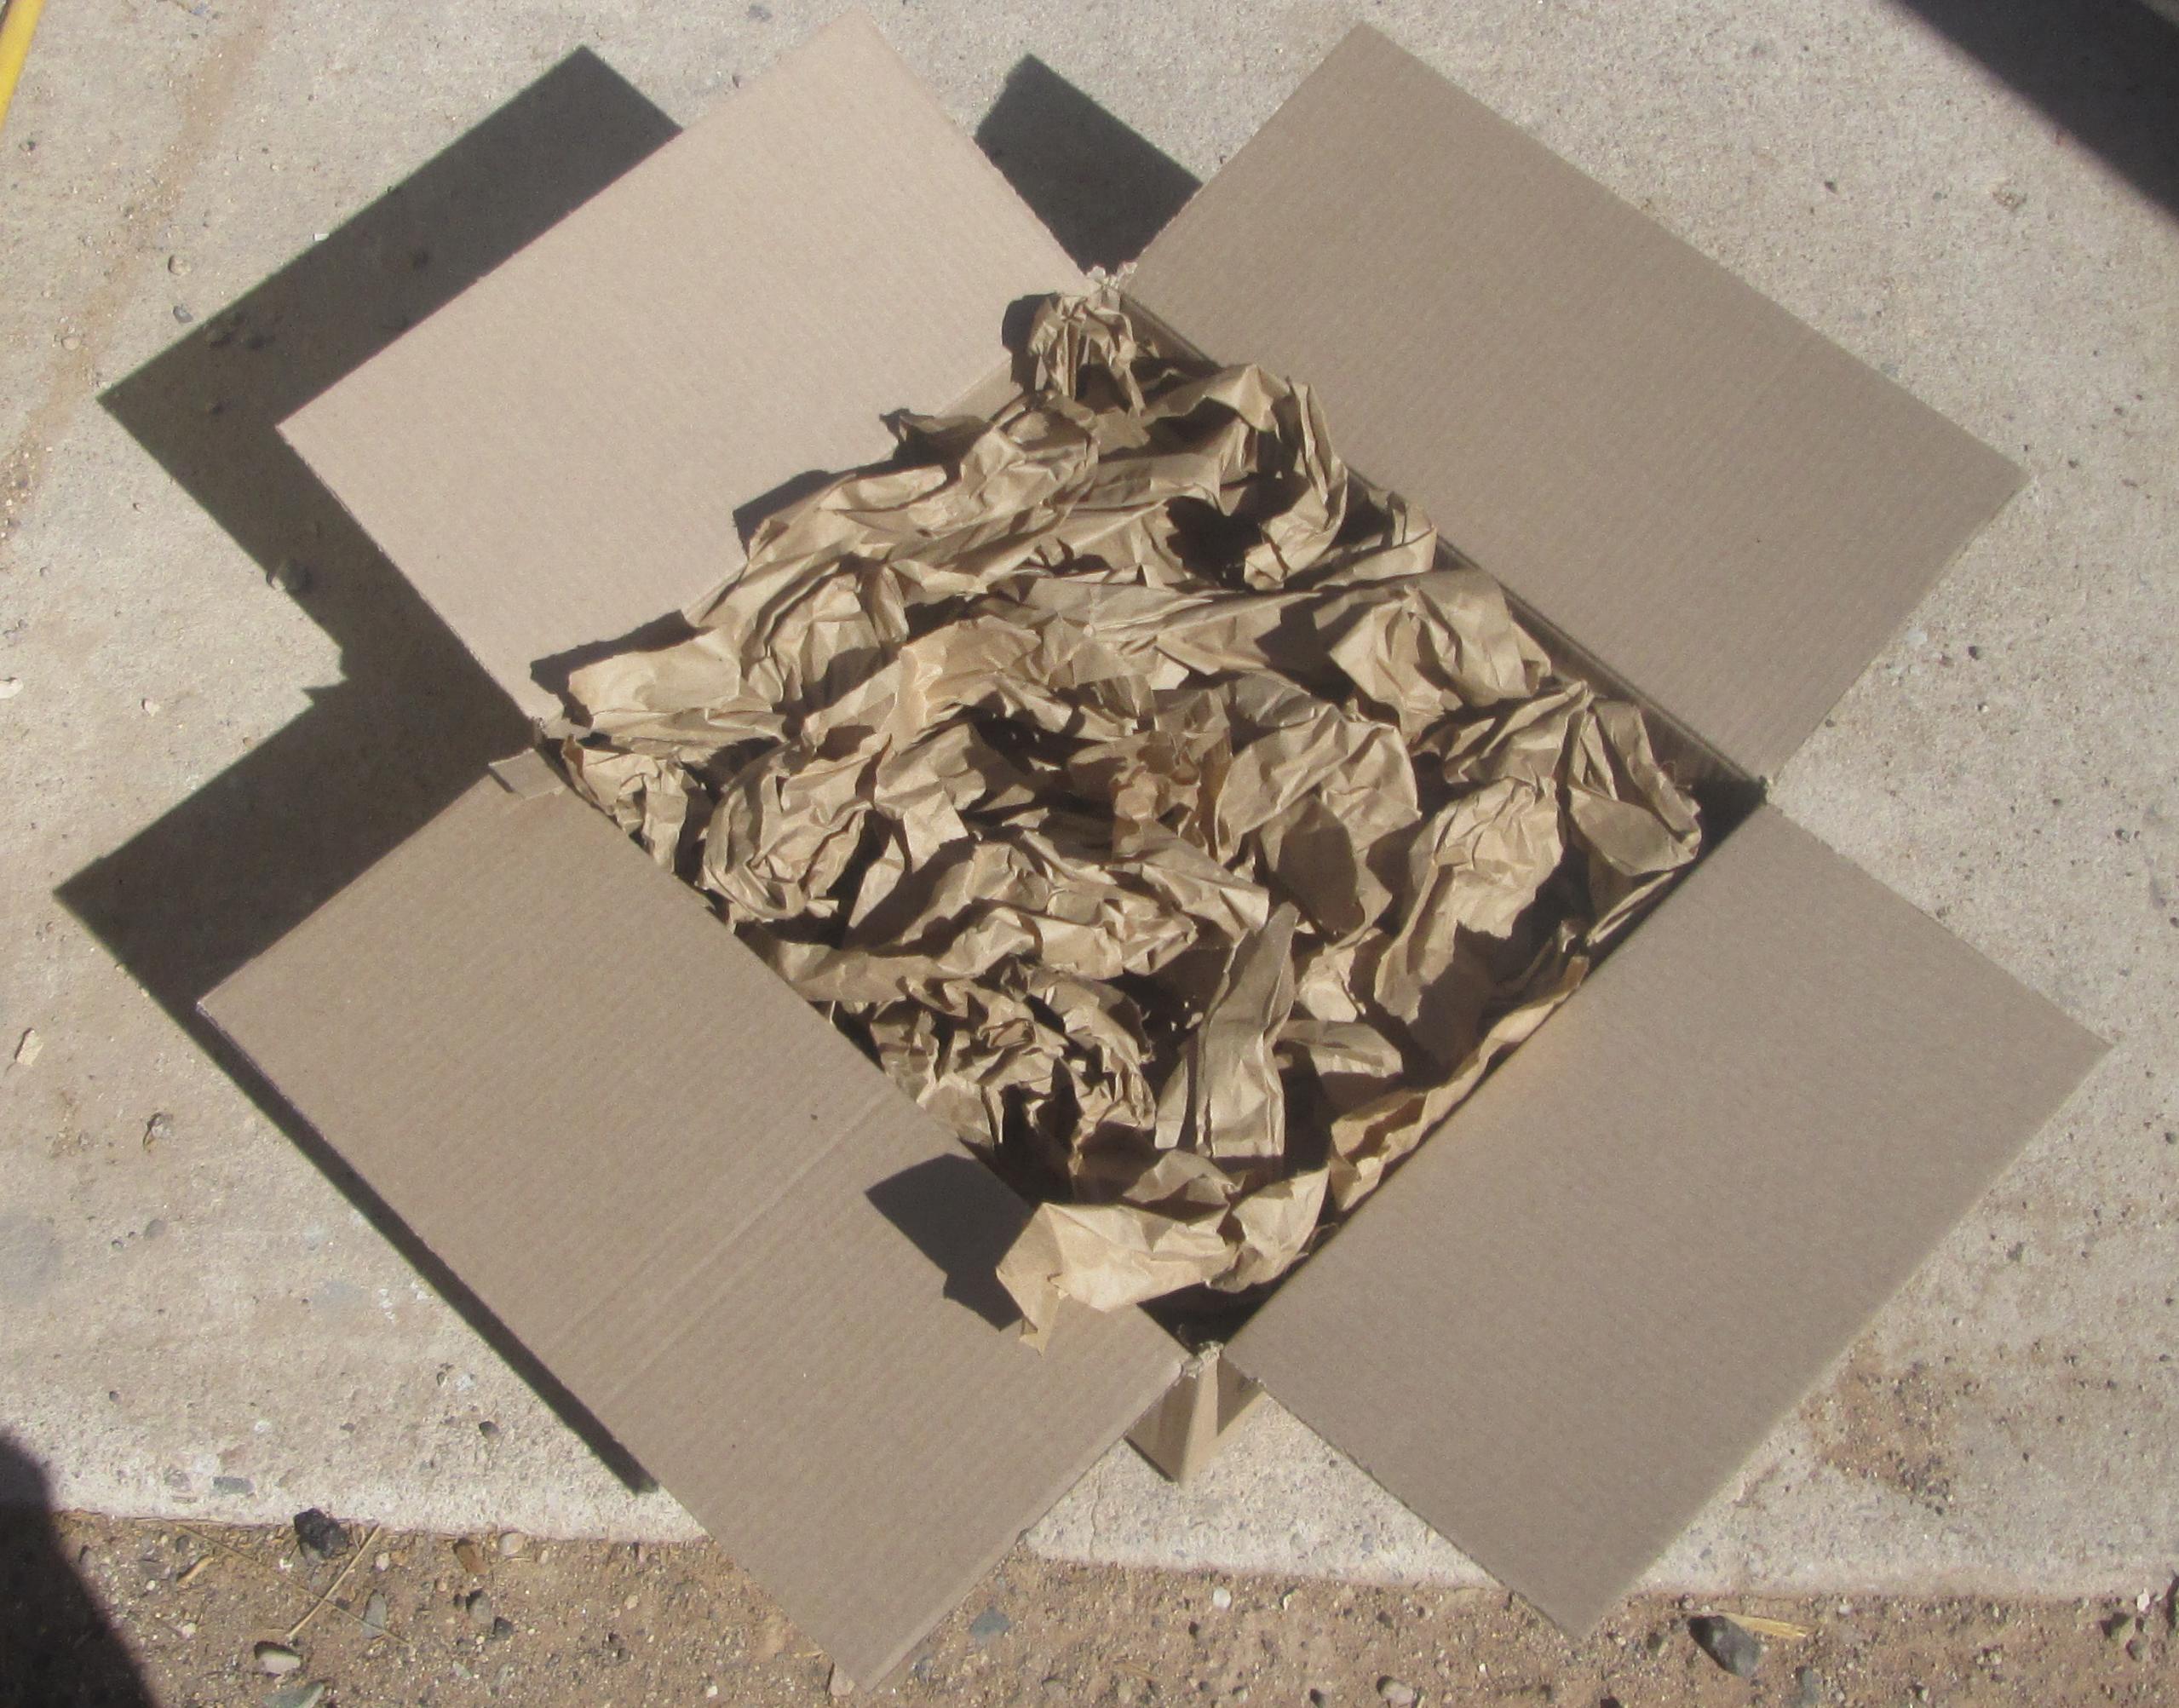
The small box is filled with wadded paper and then closed.
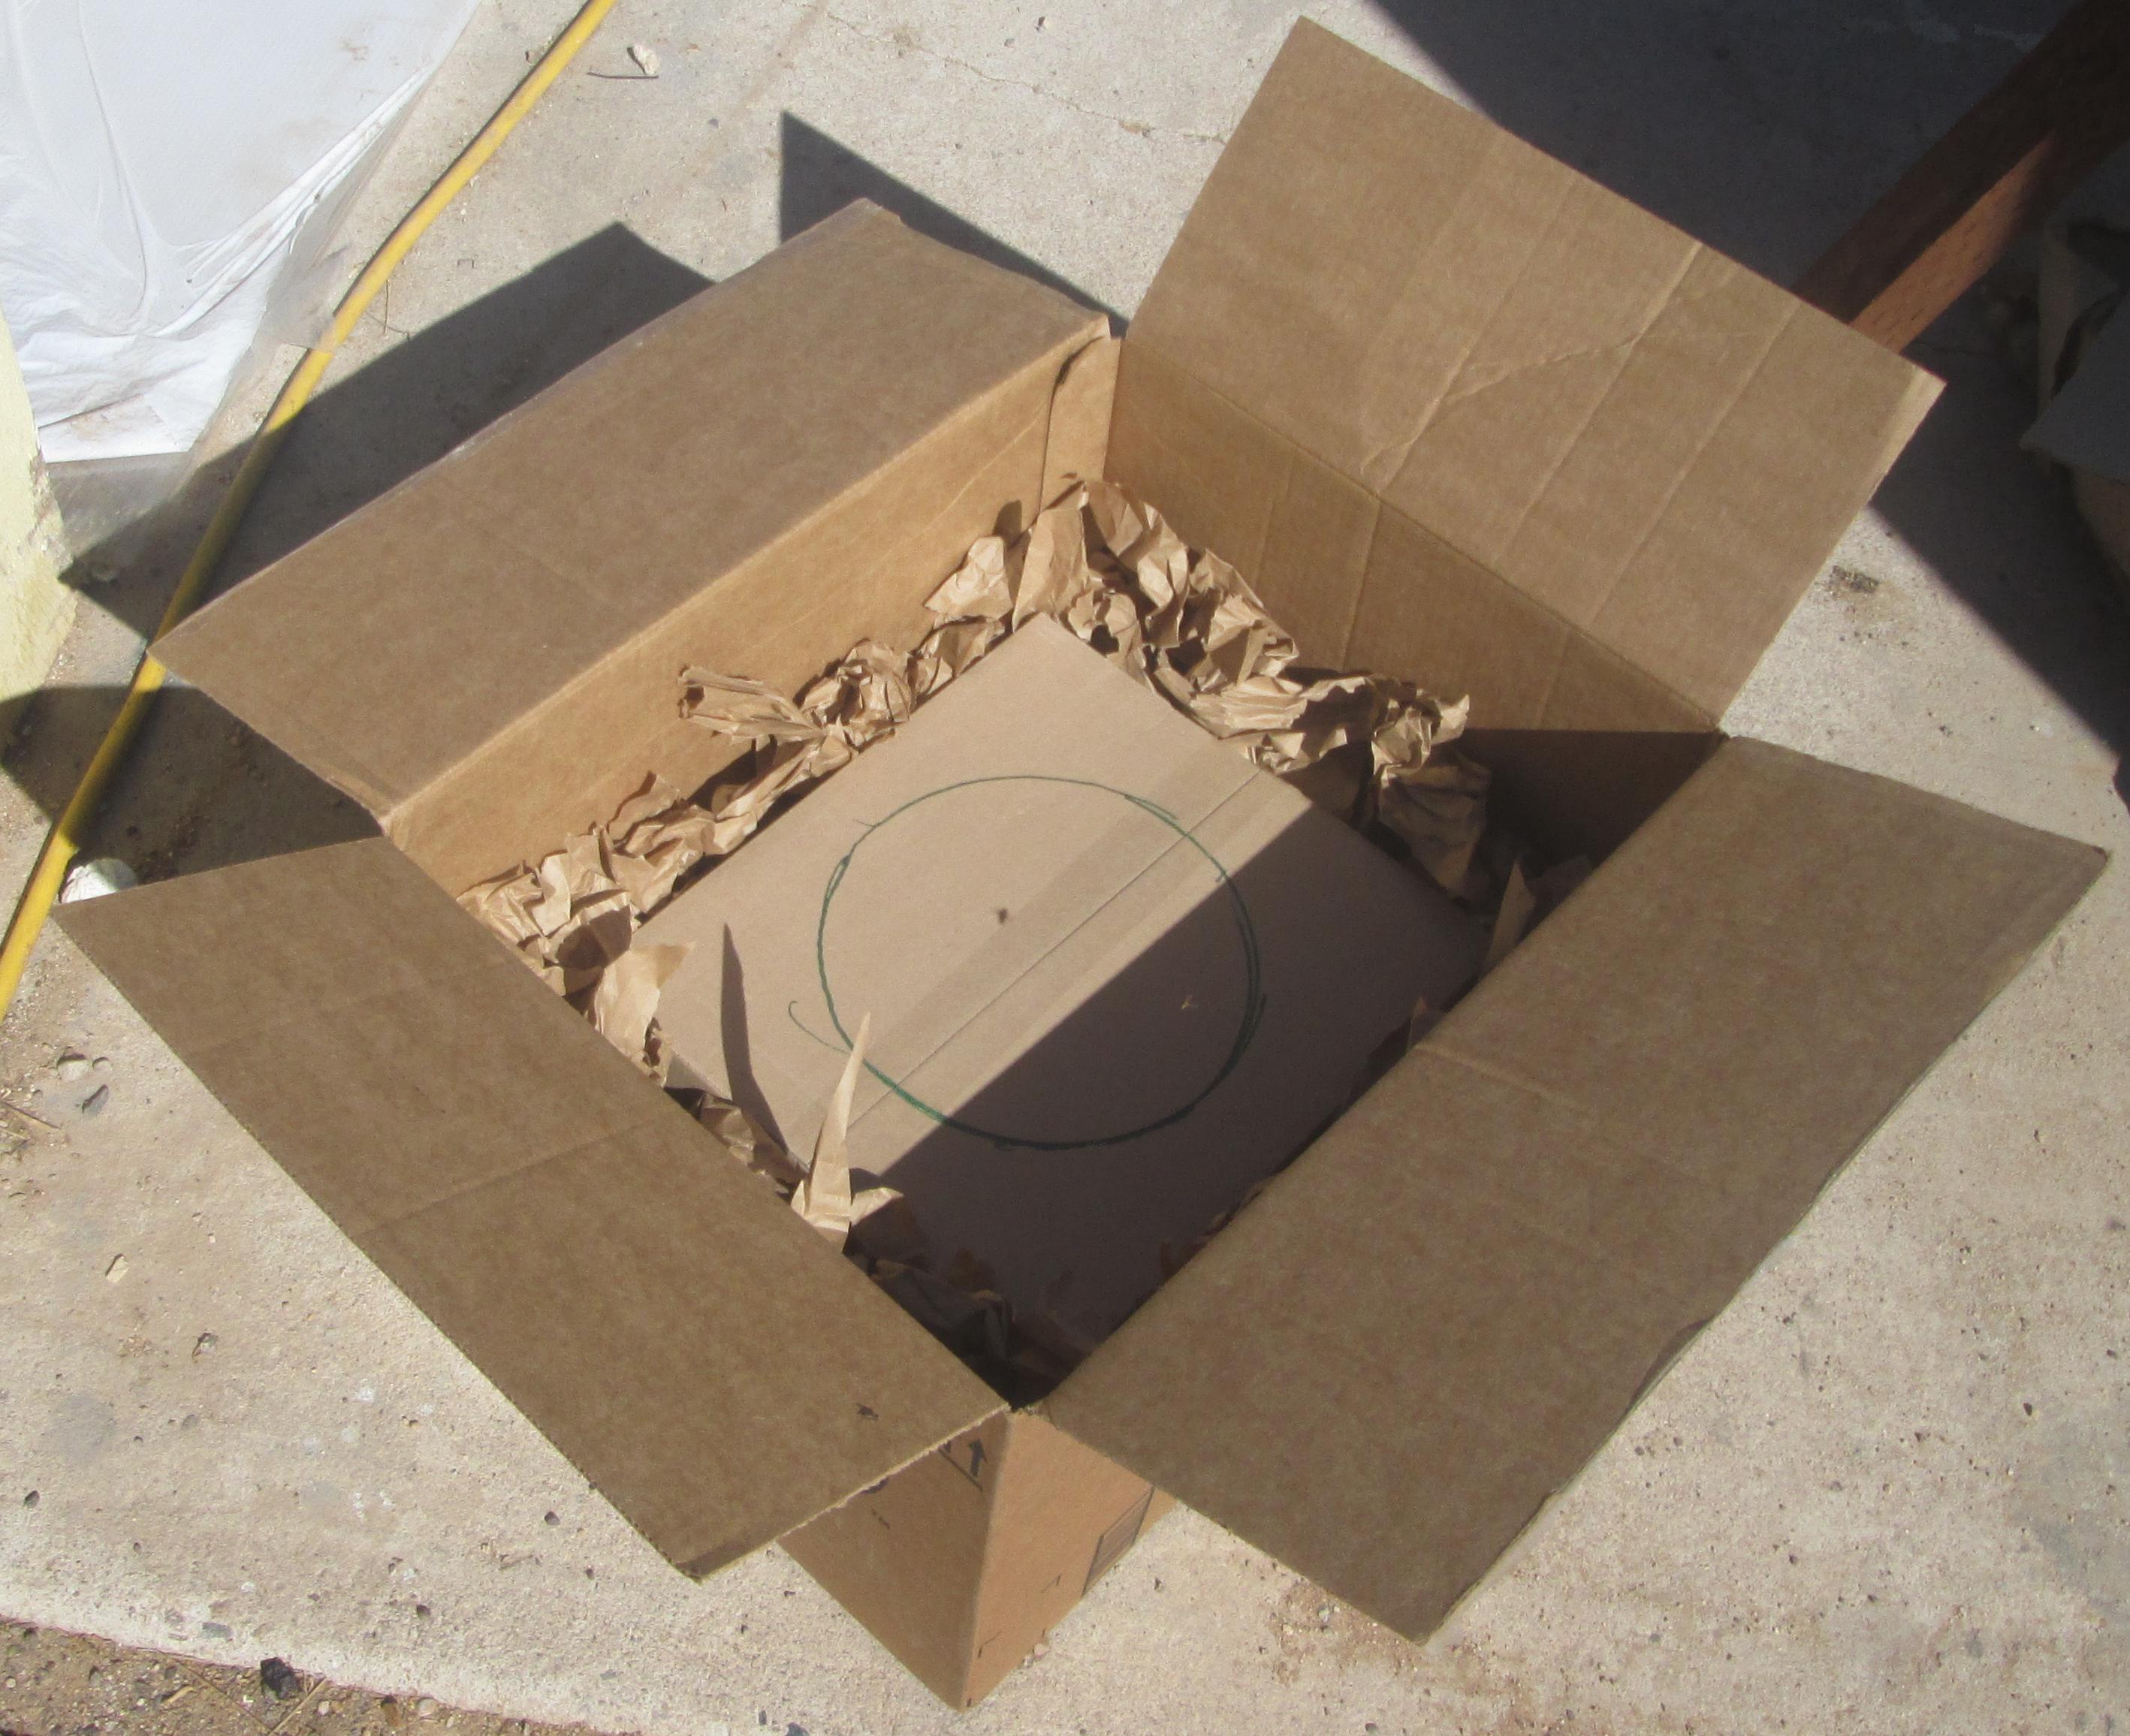
A bit of wadded up paper was put under the small box so when the flaps of the large box were bent inward, the edge touched the top of the smaller box. An outline of the pot was drawn on top of the small box.
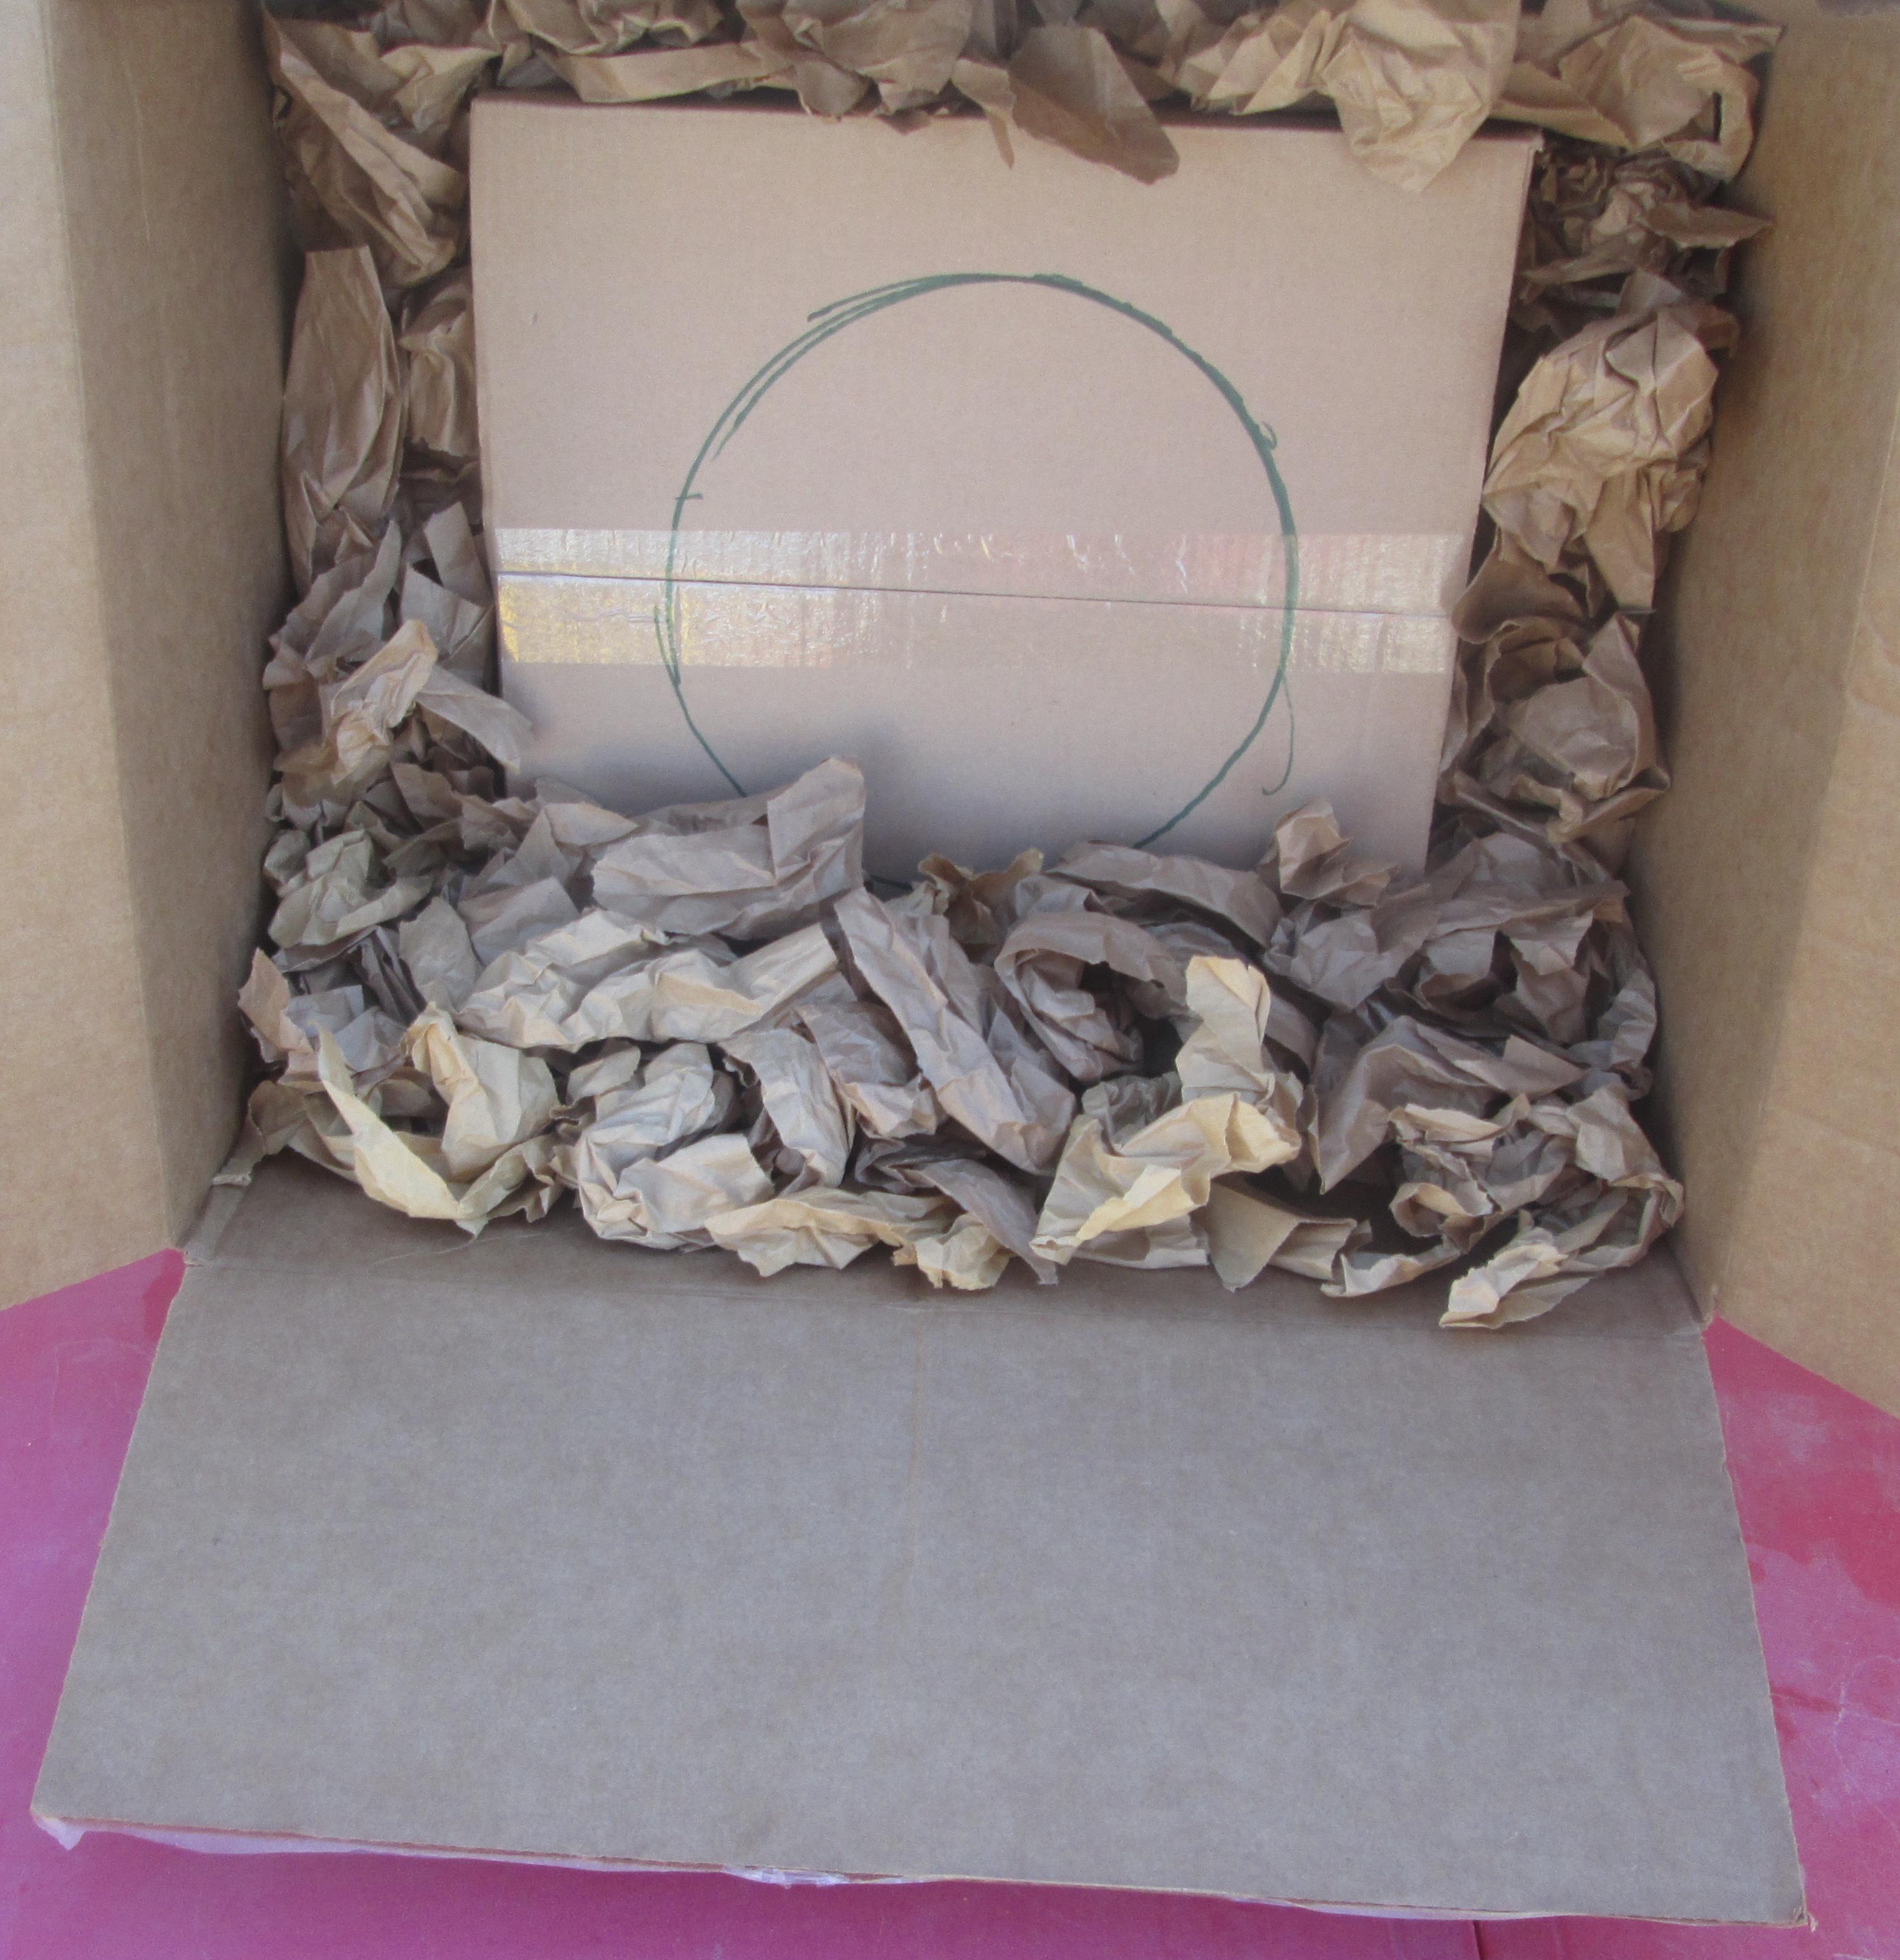
More wadding is added and then the lower flap is closed.

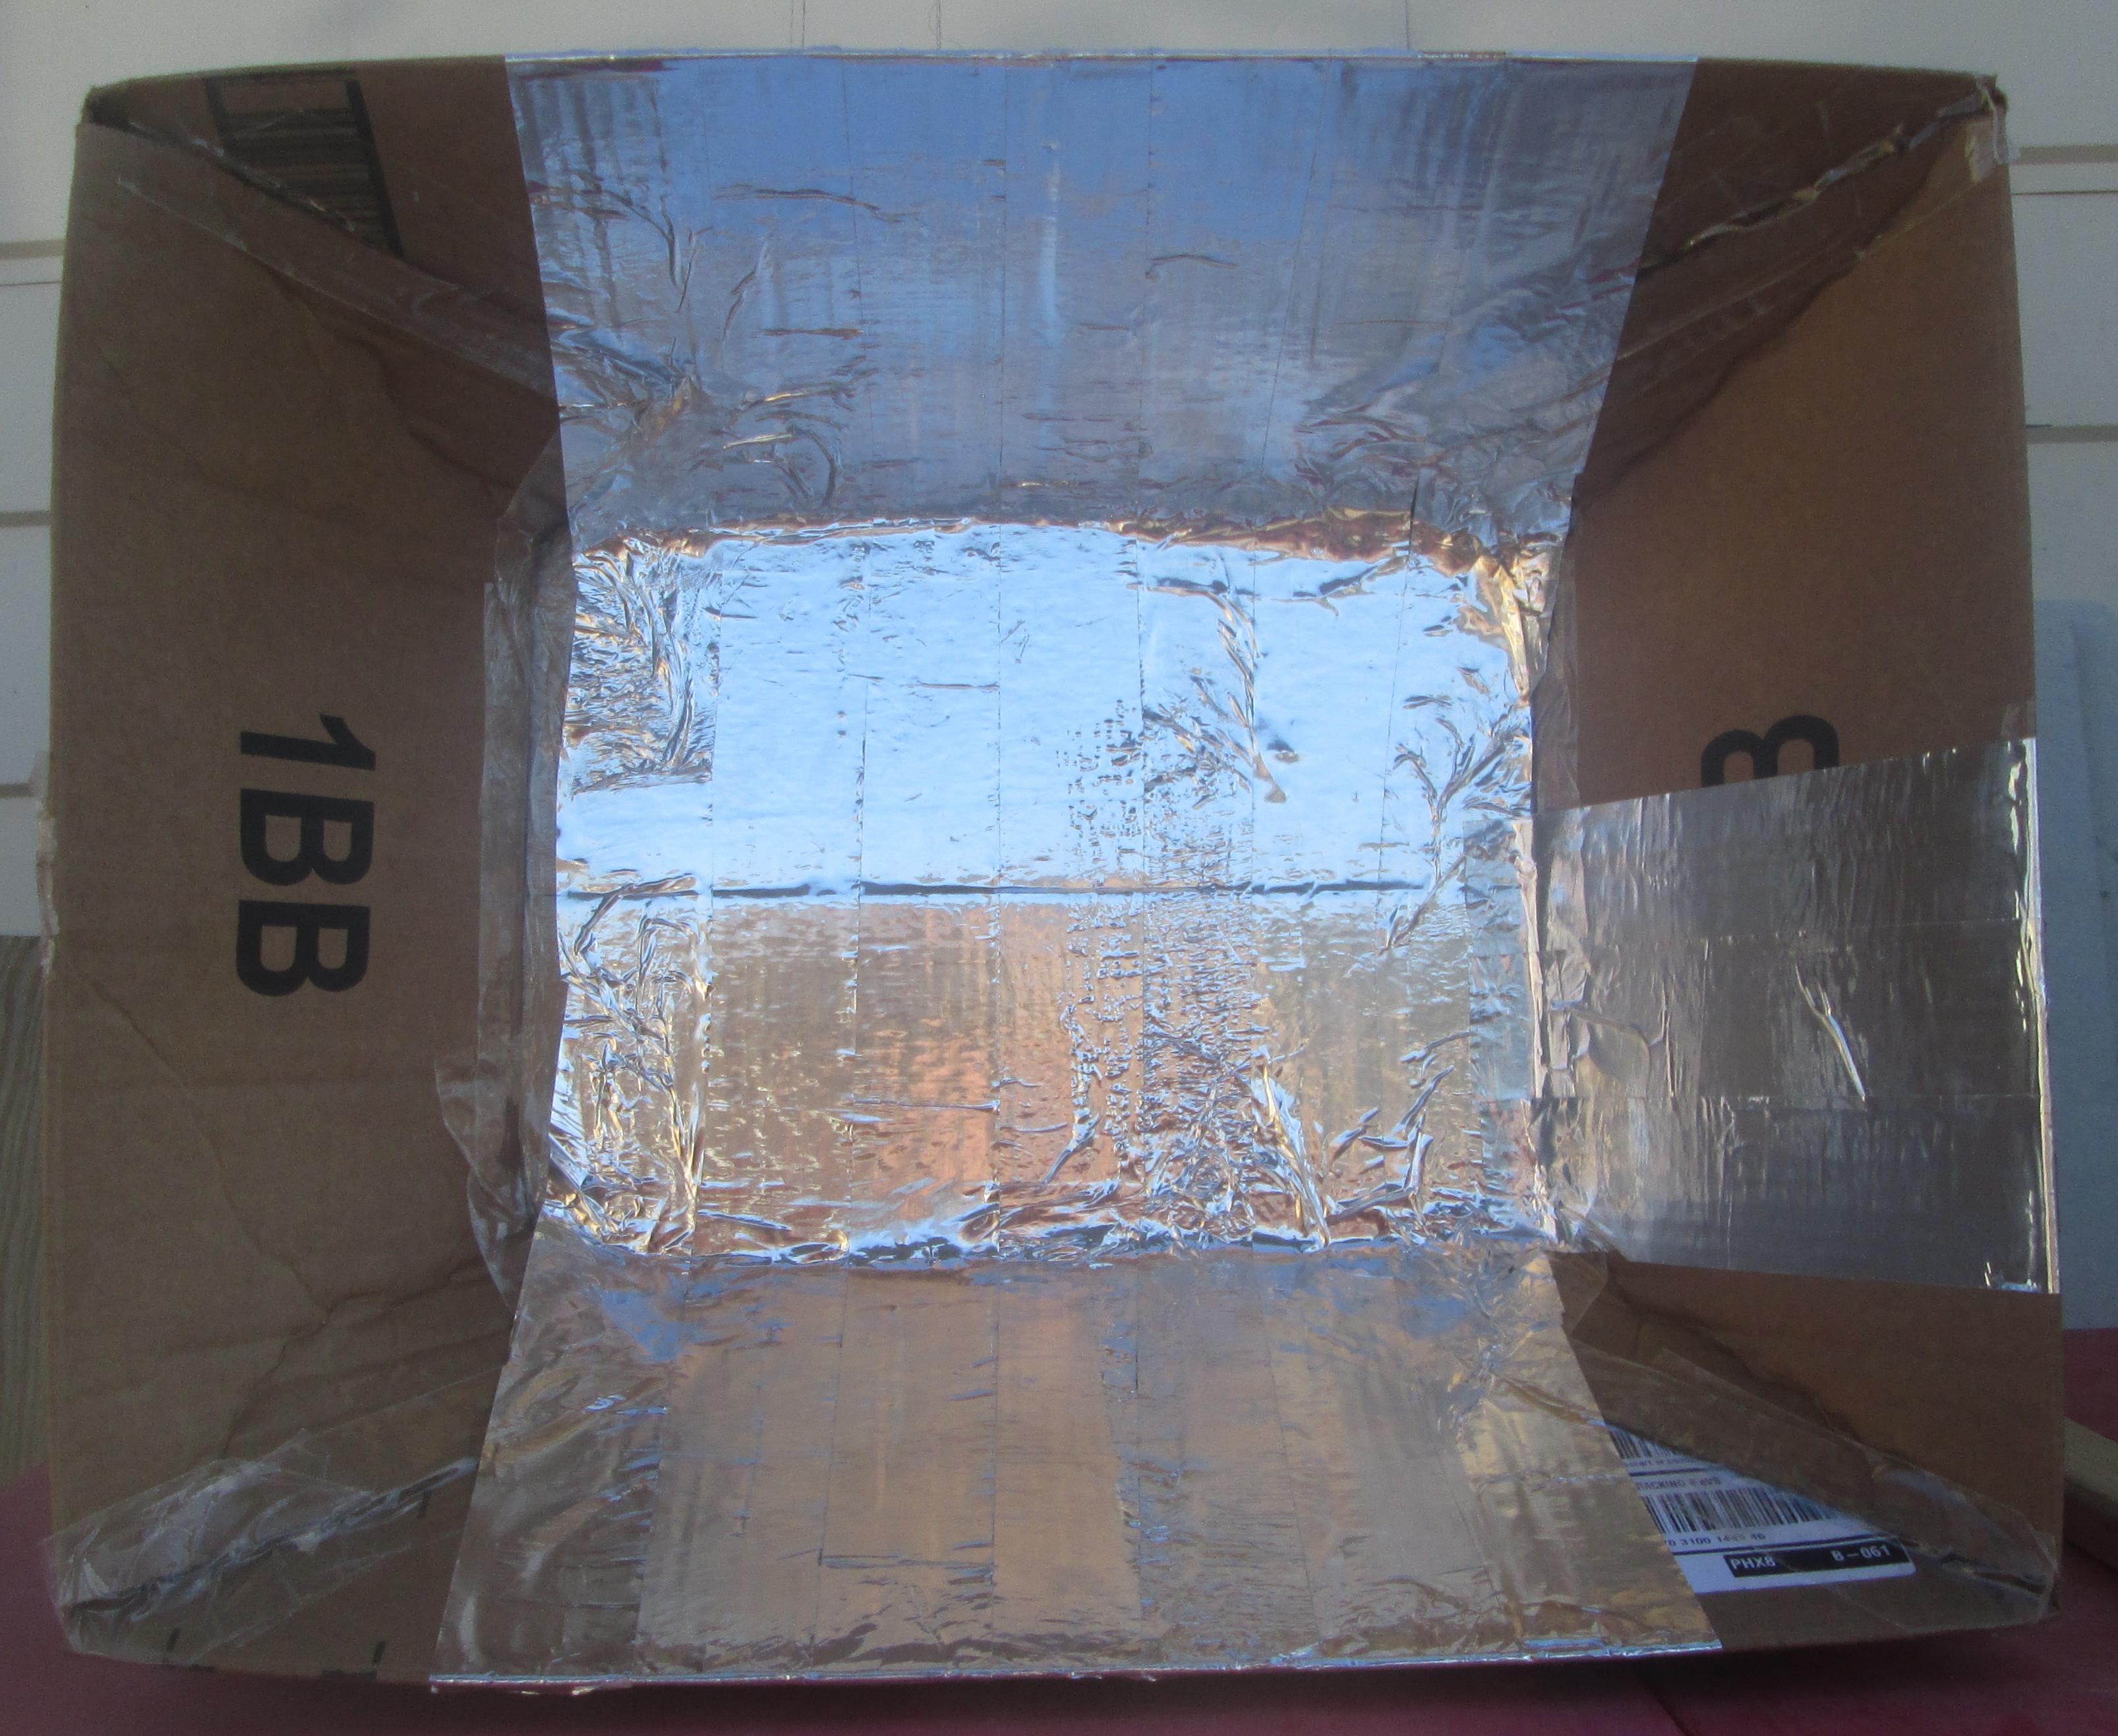
The flaps of the large box bend in just past where the pot would sit.
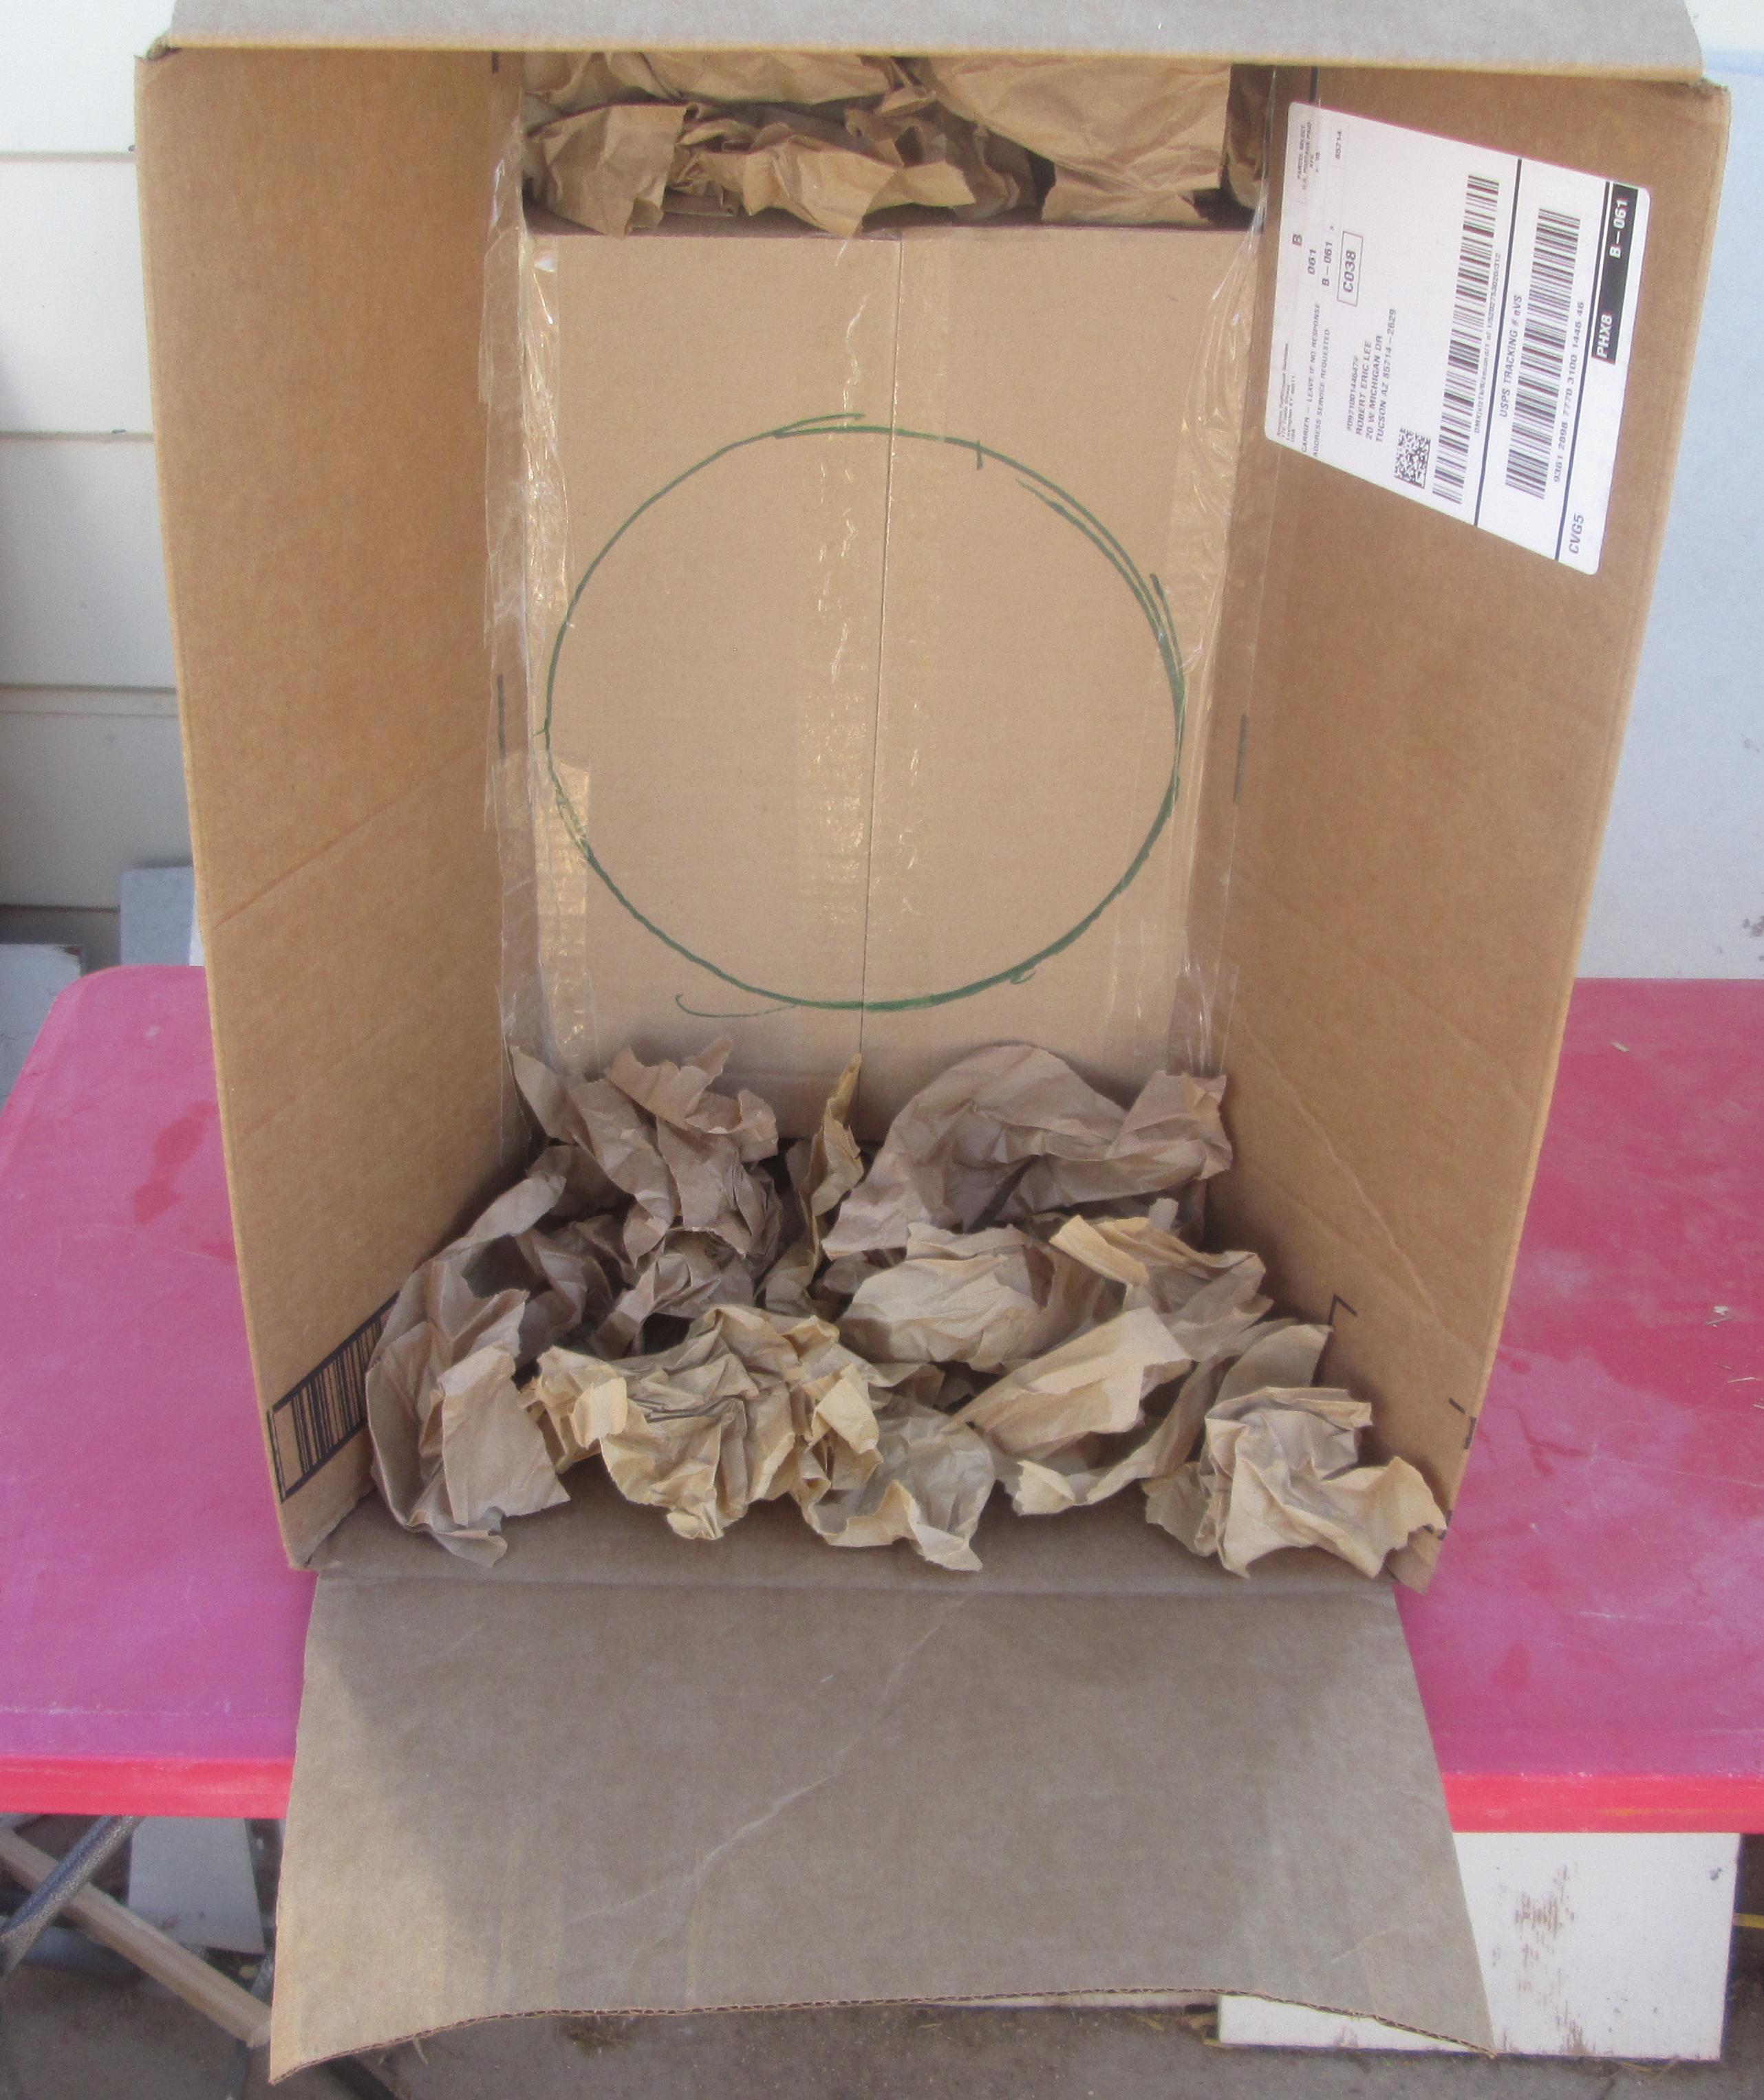
The other two smaller flaps were bent on each side so they would fold down with insulation under them and also touch the small box.
Once taped in place, foil can be added.
Two options: Use aluminum foil and glue it down with white wood/paper glue. Cut each piece of foil, spread glue, and paste the foil on. Otherwise use foil tape (e.g. Aluminum Foil Tape) which will last longer and can be kept shining longer. Use what you have, but the foil tape is less messy, is more durable, stronger, and if need be a small piece can be used to cover any blemishes that may happen.
Foil tape partially on. Start in middle and work out.
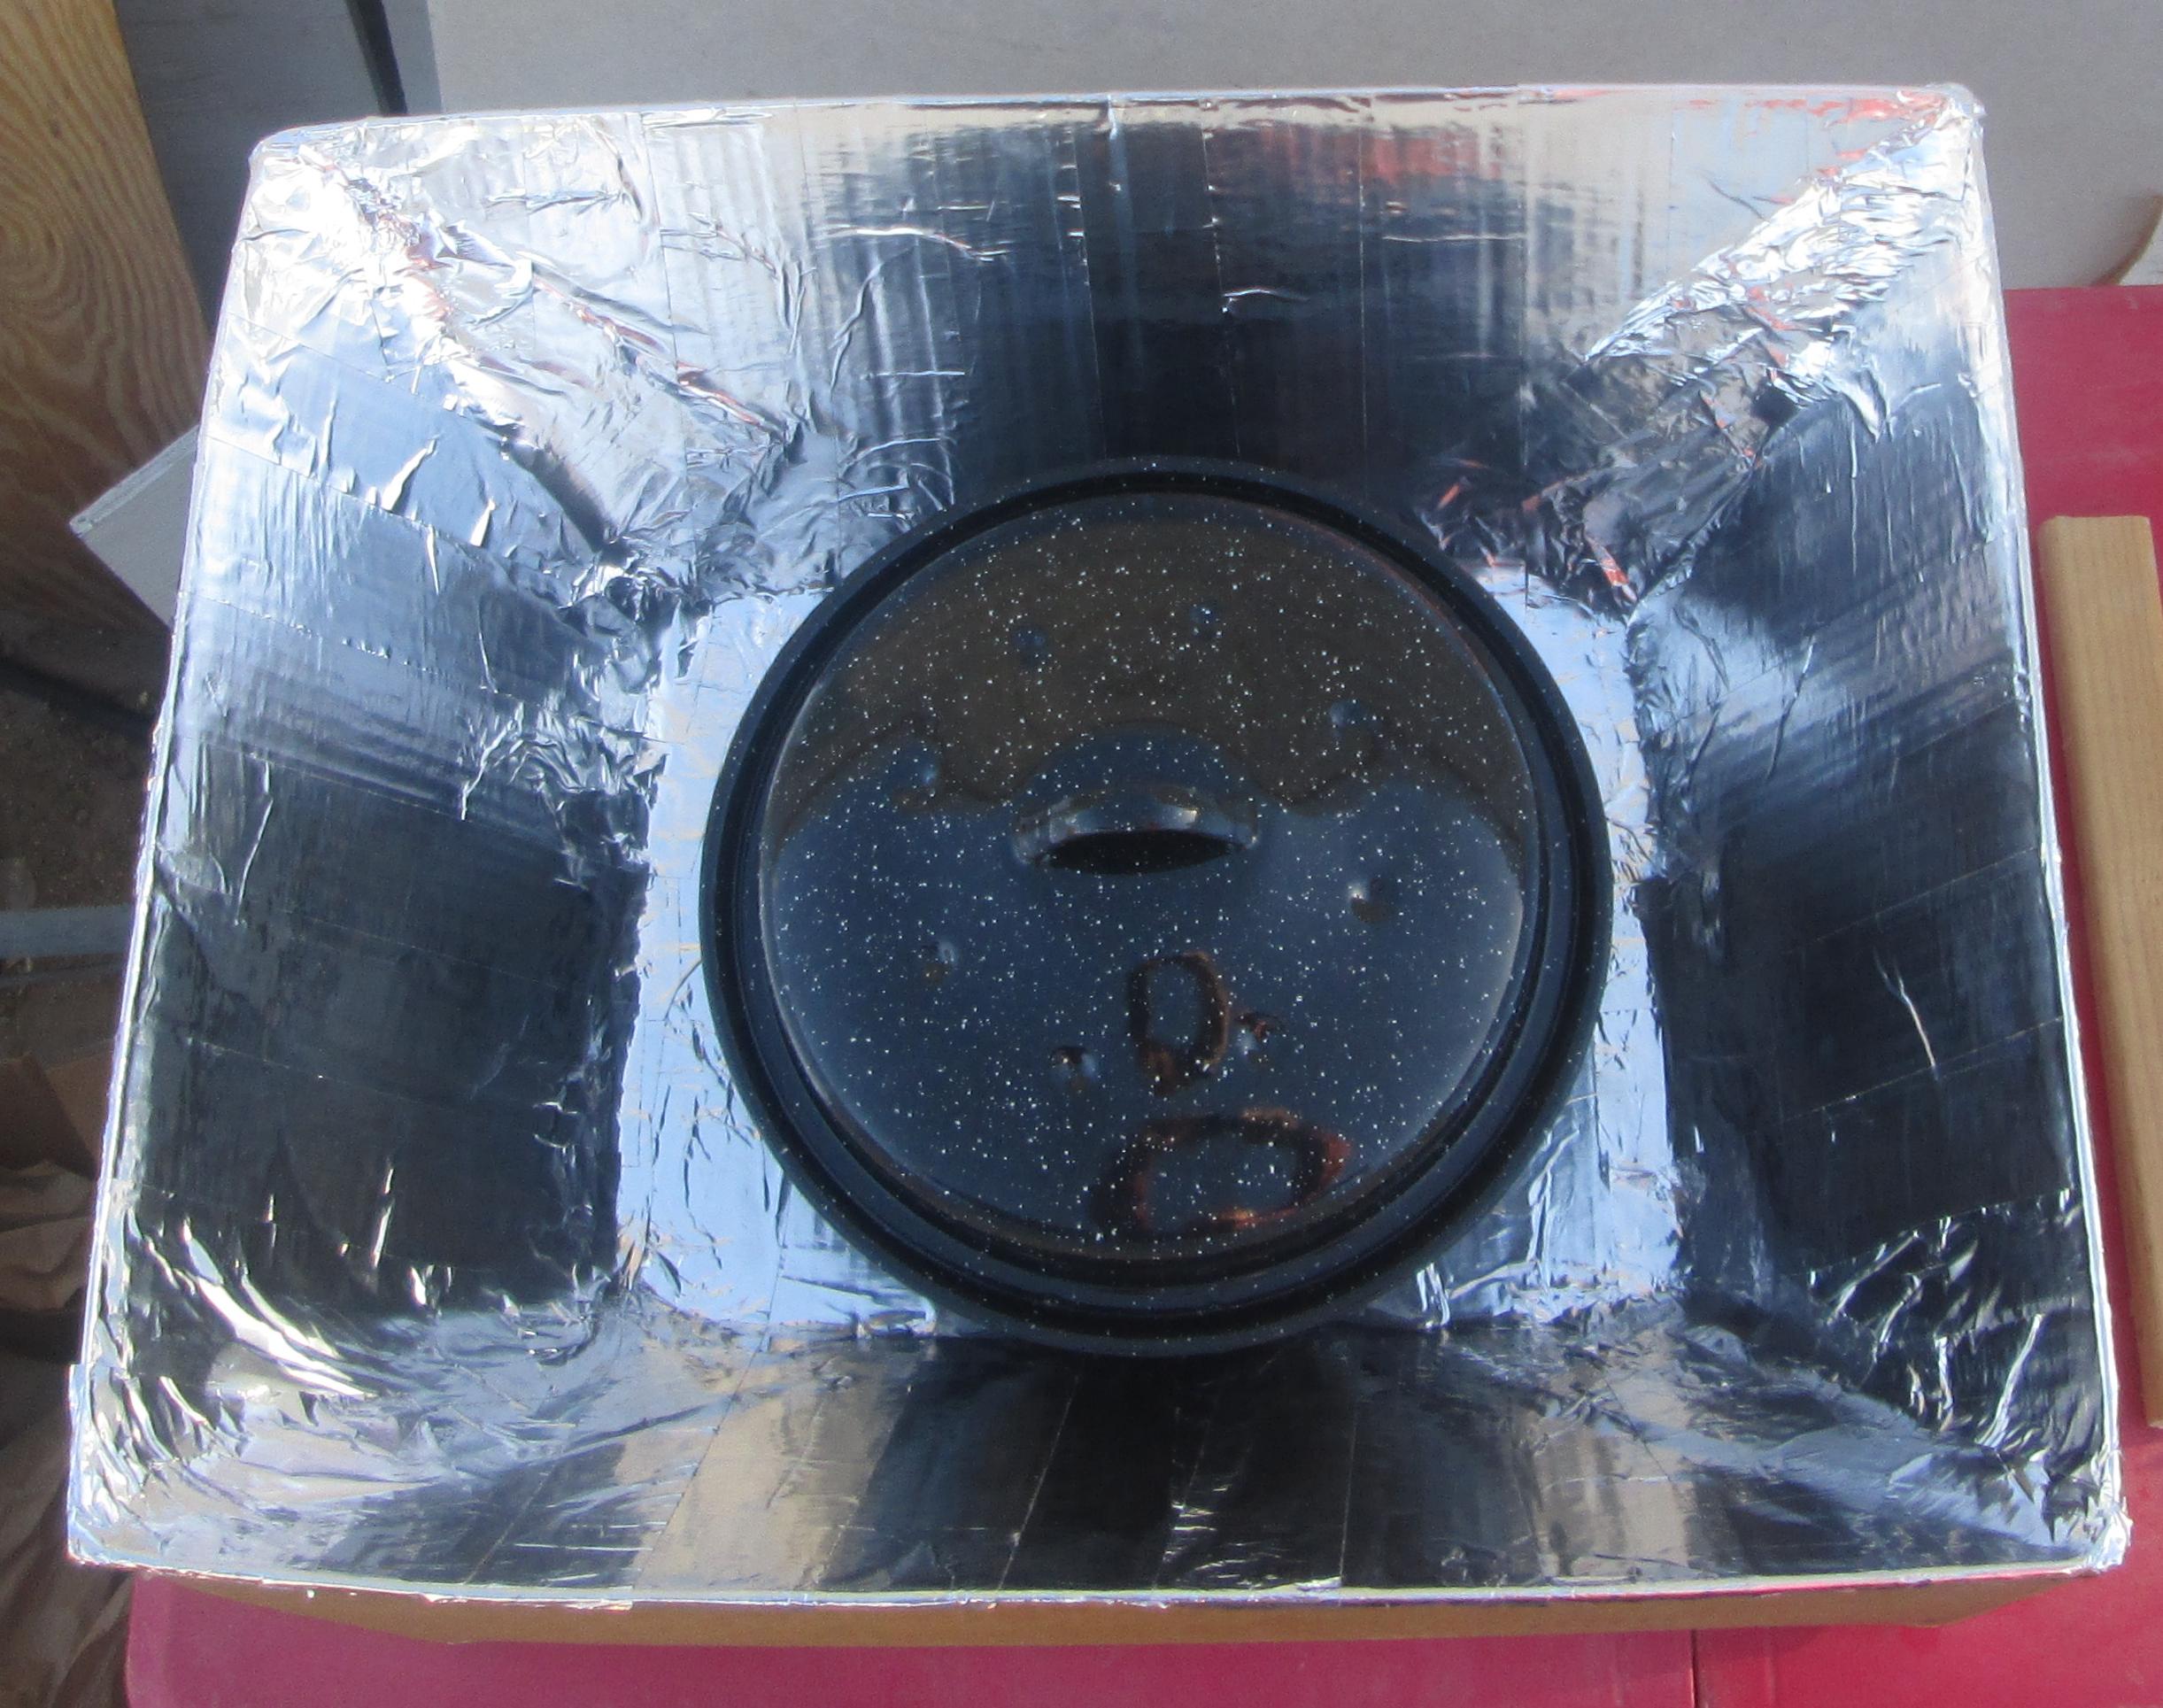
The basic box with built-in reflectors is done. Tools used: scissors to cut foil and a marker/pencil. No cardboard cut, so no box cutter needed, no ruler or straightedge. Just two hands and a bit of time. Cost: $1 worth of foil tape. Aluminum foil (regular not heavy duty) and homemade flour paste glue would be cheaper.
Basic Box Improvements
Test and see if it works well enough. If not, several more layers of improvement can be added.
Single Glazing
The easiest, quickest, biggest bang for the peso is to drape a piece of clear plastic or vinyl over the top, pull down to tighten, and go around the edge with tape, then trim off what hangs below the tape.
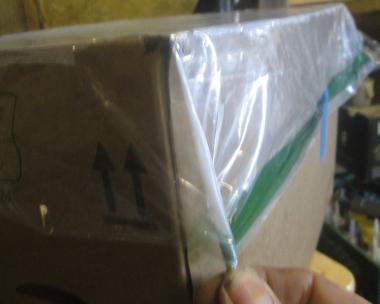

Twist corners and tack down with a bit of tape.
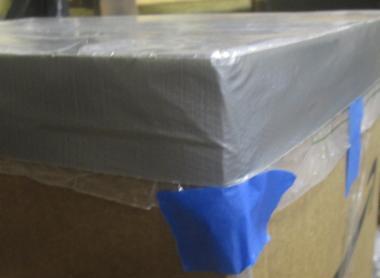
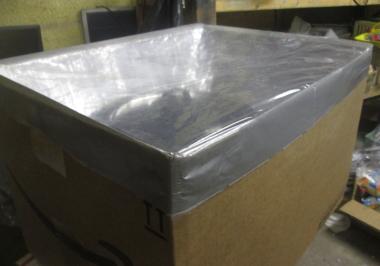
Put duct tape around and trim. A simple cover is done. Performance with glazing is about 25% better (hotter). The plastic cover fits snug on the box and helps raise the air temperature in the insulated box. It slips off to allow removing the cooked meal.
Cost: 15 cents for duct tape. Masking or package tape would be a lot cheaper. Plastic bag from trash. Oven bag plastic might be better but not free.
Double Glazing
The pot could also be inside an oven bag for double glazing. But speaking of double glazing, might as well go for the real deal. Make a frame using strips of cardboard glued together and cover top and bottom with plastic for two layers separated by a 3/4 inch gap. Putting the pot in a bag, then, would be triple glazing. Better? Guess, then test.
Glazing also serves as a lid, so making a substancial frame for the glazing will stand up to use and provide more insulation. The top edge of the box is thin, so by adding a thicker frame (more layers of cardboard), insulation is also added where it will do the most good.
The limitations of the basic box without glazing or extra reflectors are similar to those of most panel cookers. The basic box is optimized for an overhead sun, which is characteristic of life in the tropics. Most panel cookers are optimized for the summer sun in temperate areas and not the tropics (but ambient temperatures in the tropics tend to be hotter so they still work). Most panel reflector cookers, like the basic El Cheapo box (exception is All Season Solar Cooker), are also not good at catching morning or late afternoon sunshine. El Cheapo's flat top assumes the sun is overhead such as it would be in the afternoon in the tropics or at least summer time in the temperate regions not too close to the poles. To make El Cheapo more versatile wherever it may be, reflectors are needed.
Adding One Reflector
Adding a reflector can be as simple and cheap as adding a piece of cardboard with foil on one side. Since adding glazing should be done first (quick, cheap, effective), adding a reflector or reflectors should be second (if needed) and can be attached to the cover. If a simple glazing isn't enough, making the double glazed frame lid might be the next improvement, but need not be. Yet if going for the gold, get the glazing right, then add reflectors.
One reflector to reflect low hanging sun light down into the top will more than double effectiveness and so would be the mostest for the leastest. The one reflector could be a piece of cardboard foil covered on one side glued to the frame of the glazing cover. If using just single glazing that is taped on, add strips of cardboard around the tape and glue to the tape or use more tape. This minimal frame would be used to attach reflectors to. Be attaching reflectors to the glazing frame which is also the lid, the oven is opened by removing the reflector(s) too as a single piece. To track the sun, the reflectors need to hinge where attached to the lid.
Reflectors, somewhat like those used by the All Season Solar Cooker (ASSC), could also be added. Doing so would not make El Cheapo able to catch the raising or setting sun like ASSC can, as the top opening always faces up. El Cheapo, however, is never turned from one side another during the day or at any time. Adding reflectors allows the cooker to work in the afternoon in temperate areas when the sun is never close to being overhead. Early and late in the day only the upper reflector would work. But reflectors will allow cooking to start working earlier and keep cooking later than without reflectors. So add reflectors if needed. No great cost in time, effort, or money. Those living in temperate areas should probably add reflectors.
Before deciding what sort of reflectors to add, determine how the cooker is to be used. If you are a solar cooking enthusiast who plans to turn the cooker to track the sun at various times through the day in order to cook more in one pot, or several smaller amounts of differing foods at different times, then plan to add side reflectors in addition to upper and lower reflectors. To get the most sunshine in, also add four triangular pieces between the flaps. This will make a stiff reflector to resist flapping in the breeze.
The alternative style of solar cooking is the one meal per cooker per day way. El Cheapos are cheap enough that you could make two or three to cook different pots of whatever each day. Point the cooker(s) to where the sun will be in the afternoon. Put the food in, forget about it, and perhaps on your way home from work, take your hot meal out on your way to the door. If the cooker is not going to be moved every 30 to 45 minutes to maximize heating, then adding side reflectors is not needed.
The short sides of a fixed cooker should face east and west. Without reflectors the raising and setting sun can shine on the top glazing. With side reflectors on a cooker that doesn't track the sun, the glazing will be shaded until mid morning and shaded again in late afternoon. This slows the preheating and after cooking the food cools and may be too cool for a late meal. A full reflector cooker will get hotter in mid afternoon, but if it gets hot enough and long enough to cook, the maximum temperature, so long as it gets hot enough to pasteurize the food, doesn't matter. If just cooking a late afternoon or early evening meal, then no matter that it takes all day to slow cook since the only thing the cook does, perhaps with no great enthusiasm, is put a pot in and take a hot pot of slow cooked food out on most sunny days.
If the cooker doesn't move to track the daily sun, the reflectors don't have to be moved more than once a week to track the lower sun of winter and higher sun of summer.
El Cheapo Primo
If El Cheapo is made mostly from repurposed materials, then its exact size will vary. Each may be a bit different. But what if boxes are bought and any size could be used? What if 20,000 cookers were needed in a refugee camp? What would be the made to order ideal size? Answers will vary according to specific need, but an ideal size would be close to a 20 x 20 x12" high box. The prototype had 285 sq. in. gathering area and that is enough most of the time. Maximizing performance under marginal conditions, however, is acceptable if the cost is only marginally higher. So a 400 sq. in. gathering area may be more than enough most of the time, but will work more of the time, failure days will be fewer. Getting too hot is not an issue with solar slow cookers as food cannot be burned. More heat collected would mean more food could be cooked on any given day.
Because all Primos in a production run would be the same, exact measurements can be given and total cost determined. The boxes, if bought in lots of 15+, would cost about $3 US each. Still fairly cheap. Using recycled loose fill insulation would cost about $1.40 per Primo. All materials could be shipped where needed if the needy could be taught to make Primos. Local DIY types could buy materials to make 50 and sell at farmer's markets or other local markets.
[under development]